
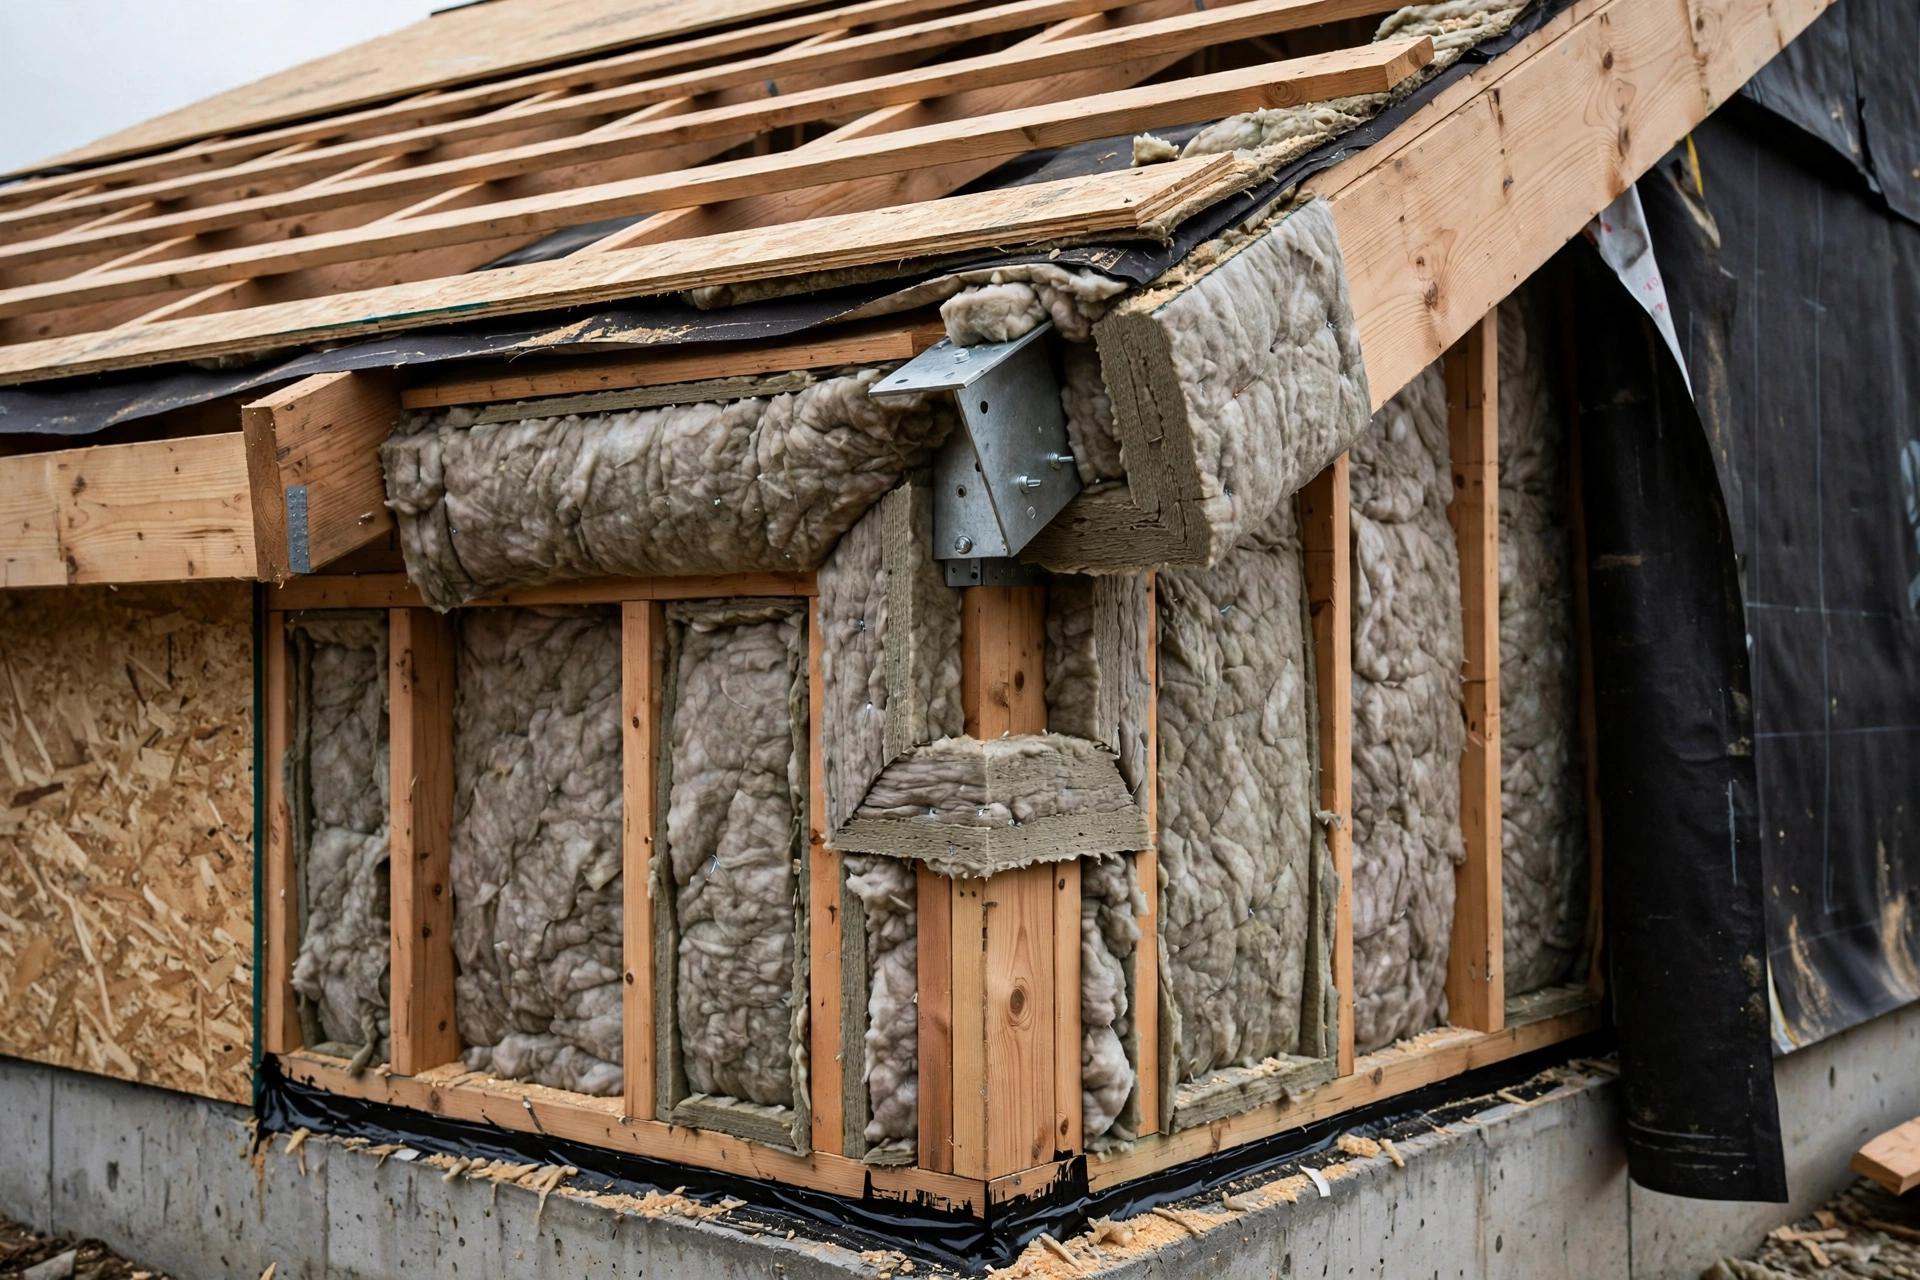
The junction where a roof meets a wall is one of the most important details in a house, and also one of the easiest to get wrong. It is the point where two insulated assemblies meet, where framing members pile up, and where insulation is often squeezed, interrupted, or left out entirely. The result is a thermal bridge: a path of least resistance that lets heat escape in winter, lets warm air condense into moisture, and leaves the rooms below colder, damper, and more expensive to heat than the rest of the house.
Preventing it means keeping the insulation layer continuous across the junction, breaking the conductive path through the framing, and sealing the air leaks that make the bridge worse. Raised-heel trusses, continuous exterior insulation, and structural thermal breaks or insulated wall plates are the most effective fixes, and most are straightforward during new construction or a re-roof.
What Thermal Bridging Does at the Roof-to-Wall Junction
A thermal bridge is any place where a conductive material passes through or around the insulation layer, creating a shortcut for heat. Wood framing conducts heat several times faster than insulation, and steel conducts it hundreds of times faster, so every rafter, truss heel, wall plate, and rim board at the roof-to-wall junction is a potential bridge. Where the roof meets the wall, the problem is worse than at a plain wall because the framing is denser: the top plate, the truss or rafter ends, the ceiling joists, and the rim board all converge in a small space, and the insulation has to weave around them.
The consequences go beyond a slightly higher heating bill. In winter, the interior surface near a bridged junction runs colder than the surrounding wall or ceiling. When that surface drops below the dew point of the indoor air, condensation forms inside the assembly, often hidden behind drywall or under insulation. Over seasons, that moisture feeds mould growth, stains ceilings at the eaves, and slowly rots the timber it touches. Homeowners usually notice the symptoms first: a cold stripe along the top of exterior walls, damp patches or dark staining near the ceiling line, and rooms that never feel warm even when the heating system is working hard.
Where Roof-to-Wall Thermal Bridges Hide in a Typical House
Not every roof-to-wall junction fails in the same way, so the first step is knowing where to look. The worst bridge in most older houses sits at the eaves, where a standard truss heel leaves only a few inches between the top plate and the roof deck. Insulation batts get compressed into that wedge, losing much of their rated R-value, or the installer simply leaves the wedge empty because the batt will not fit. The result is a band of nearly uninsulated ceiling running the full perimeter of the house.
The Eaves Wedge and the Compressed Batt Problem
Compressed insulation is a quiet performance killer. A batt rated at R-30 that is squeezed into a four-inch space performs closer to R-13, and the wedge at the eaves is exactly where squeezing happens most. The fix is depth: raised-heel trusses, which lift the roof plane above the wall plate, create a full-depth insulation pocket at the eaves. Where trusses cannot be changed, rigid foam or high-density batts cut to fit the wedge, plus an air barrier to stop wind washing, recover much of the lost performance.
How Heat, Condensation, and Mould Follow a Cold Junction
Heat moves through a thermal bridge by conduction, but the damage is usually done by moisture. Warm indoor air holds water vapour, and when that air reaches a cold surface at a bridged junction, the vapour condenses into liquid water. Because the junction is hidden inside the assembly, the condensation can continue for months before anyone sees a stain. Insulation that gets wet also loses performance, which makes the surface colder still, which causes more condensation: a slow, self-reinforcing cycle.
Air leakage accelerates the process. The roof-to-wall junction is a natural leak point, since so many components meet there and each joint can open with seasonal movement. Leaking air carries far more moisture into the assembly than vapour diffusion alone, so a bridged junction that also leaks air is the worst combination. This is why air sealing and thermal bridging must be addressed together: insulation without air sealing still leaves the moisture path open, and air sealing without insulation still leaves a cold surface.
- Cold stripes along the top of exterior walls in winter, often visible on a thermal camera as a bright band at the ceiling line.
- Condensation or frost on the inside of the roof deck near the eaves, found during attic inspections.
- Dark staining, peeling paint, or mould growth on the ceiling near exterior walls.
- Ice dams forming at the eaves, fed by heat escaping through the bridged junction and melting snow above.
- Rooms that feel draughty or cold near exterior walls even when the thermostat reads a comfortable temperature.
Raised-Heel Trusses and Other Framing Fixes That Open Up Insulation Depth
The single most effective change is giving the insulation room to work. Raised-heel trusses, also called energy trusses, lift the top chord above the wall plate so full-depth insulation can run continuously from the wall to the roof. A heel height of 12 to 16 inches is common, and on a new build the small premium over standard trusses pays back in comfort and energy savings for the life of the house.
Where the roof structure already exists, other framing adjustments can still help. Furring the ceiling down a few inches creates space for additional insulation, though it lowers the ceiling slightly. In a re-roof, adding rigid insulation above the roof deck moves the thermal boundary outward and keeps the existing framing warm. For gable ends, setting the gable truss a short distance inside the wall and filling the gap with insulation breaks a bridge that many builders leave in place by default.
Continuous Insulation and Thermal Breaks Across the Roof-Wall Line
Continuous exterior insulation is the most reliable way to deal with framing bridges, because it wraps the structure in a layer that the framing cannot interrupt. Rigid foam, mineral wool boards, or wood-fibre insulation fixed to the outside of the wall sheathing and carried up past the roof junction keeps the wall plate, rim board, and truss heels inside the warm envelope. The key detail is continuity: the insulation must run from the wall, across the junction, and onto the roof or up the parapet without gaps, and every joint must be taped or sealed so air cannot bypass it.
Where a structural element genuinely must cross the envelope, a structural thermal break is the answer: a load-bearing insulating element, often made from high-strength polyurethane or mineral-based composites, that sits between the inner and outer parts of the connection. Insulated wall plates are a residential version of the same idea, replacing the top course of blockwork at the eaves. Any thermal break must be specified for the loads it will carry, so structural input is essential.
| Method | How it breaks the bridge | Best suited to |
|---|---|---|
| Raised-heel trusses | Full-depth insulation reaches the wall line | New builds and full roof replacements |
| Continuous exterior insulation | Wraps framing so it stays inside the warm envelope | Re-cladding, retrofits, and new builds |
| Insulated wall plate | Pre-insulated plate replaces the top blockwork course | Masonry new builds at the eaves |
| Structural thermal break | Load-bearing insulating element across the connection | Parapets, balconies, and roof penetrations |
| Above-deck rigid insulation | Moves the thermal boundary above the roof structure | Re-roofing projects |
Sealing the Air Leaks That Make Thermal Bridges Worse
Air sealing the roof-to-wall junction is a job that rewards patience. The gaps to find are the joint between the top plate and the wall sheathing, the gaps around truss and rafter ends, penetrations for wiring and plumbing vents, and the rim board at each floor line. A bead of sealant, a strip of airtight tape, or a layer of closed-cell spray foam at these joints stops the warm, moist air that would otherwise stream through the bridge and condense inside the assembly.
The work is best done from the attic side, where the junction is accessible, and it should happen before new insulation goes in. In an existing attic, removing the old insulation near the eaves, sealing the gaps, and then replacing the insulation with full-depth material is a common sequence. A blower-door test before and after the work shows how much leakage was stopped, and it often reveals other leaks at the same time, since the junction is rarely the only weak point in an older house.
What Thermal Bridging Repairs Cost and When a Structural Engineer Belongs in the Room
Costs vary with scope, but the pattern is consistent: measures taken during construction or a planned re-roof are far cheaper than the same measures added later. Air sealing and topping up insulation at the eaves is a modest job, often done in a day or two. Adding continuous exterior insulation is a bigger project, best timed with cladding renewal, while replacing trusses on an existing roof is rarely practical.
A structural engineer should be involved whenever the repair changes how loads travel through the junction. That includes installing structural thermal breaks, altering truss heels, cutting or notching framing to fit insulation, or adding above-deck insulation that changes the roof build-up. The engineer confirms the connection still carries wind, snow, and gravity loads after the thermal fix, and the sign-off is often needed for building control approval. For air sealing and insulation-only work, a competent insulation contractor following the product manufacturer’s guidance is usually enough.
| Measure | Typical scope | Cost signal |
|---|---|---|
| Eaves air sealing and insulation top-up | Attic work, one to two days | Modest; often the best return per dollar spent |
| Raised-heel trusses on a new build | Specified at design stage | Small premium over standard trusses |
| Continuous exterior insulation | Re-cladding project | Significant; best timed with cladding renewal |
| Structural thermal break at a parapet | Engineered connection detail | Higher; needs structural design input |
| Above-deck rigid insulation | During a re-roof | Moderate; adds material and labour to the re-roof |
Roof-to-Wall Thermal Bridging Questions Homeowners Ask
Can thermal bridging at the roof-to-wall junction cause mould?
Yes. When the interior surface near the junction stays cold enough for indoor moisture to condense, mould can grow on the cold surface or inside the assembly. The risk is highest in winter, in homes with high indoor humidity, and where the junction also leaks air. Fixing the insulation and the air sealing together removes both the cold surface and the moisture supply.
How can I tell if my eaves have a thermal bridge?
Look for a cold stripe along the top of exterior walls, damp or stained patches near the ceiling line, and ice dams at the eaves. A thermal imaging survey in cold weather makes the bridge obvious, showing a warm band along the roof edge where heat is escaping. An attic inspection that finds thin, compressed, or missing insulation at the eaves confirms it.
Do raised-heel trusses really make a difference?
Yes, they are one of the most effective single changes at this junction. By lifting the roof plane above the wall plate, they allow full-depth ceiling insulation to run out to the wall line instead of being squeezed into a wedge. The result is a continuous insulation layer and a much warmer eaves junction.
Is exterior insulation enough on its own?
It deals with the conduction path very effectively, but it works best combined with air sealing. If warm air still leaks through the junction, moisture can bypass the insulation and condense inside the assembly, so seal the air leaks first.
Can I fix a roof-to-wall thermal bridge without removing the roof?
Often, yes. From the attic you can air-seal the junction and add insulation at the eaves. From outside, insulation can be added when the cladding or roofing is replaced. Full structural changes, such as replacing trusses or installing thermal breaks, usually need the roof or wall opened up, so they are best timed with larger renovation work.
Does thermal bridging affect my heating bill much?
A single bridge is a small share of total heat loss, but the roof-to-wall junction runs the full perimeter of the house, so the loss adds up. More importantly, the condensation and comfort problems it causes are usually the reason homeowners act, and fixing the junction often improves comfort noticeably even before the energy savings show up on a bill.
Final Thoughts: A Warm, Dry Roof-to-Wall Junction Is a Detail, Not an Accident
The roof-to-wall junction will always be a busy place in a house, with framing, insulation, air barriers, and weatherproofing all meeting in a few inches. Getting it right is a matter of detail rather than expense: full-depth insulation at the eaves, a continuous layer carried across the junction, air sealing at every joint, and a thermal break wherever structure must cross the envelope. Done well, the junction disappears into the background of a warm, dry, comfortable home, which is exactly what a good building detail should do.
